Version: 1.0.6
Date: August 6, 2025
Product: CyberTwice CyberGate with 2N IP Intercoms
2N IP Intercom Overview
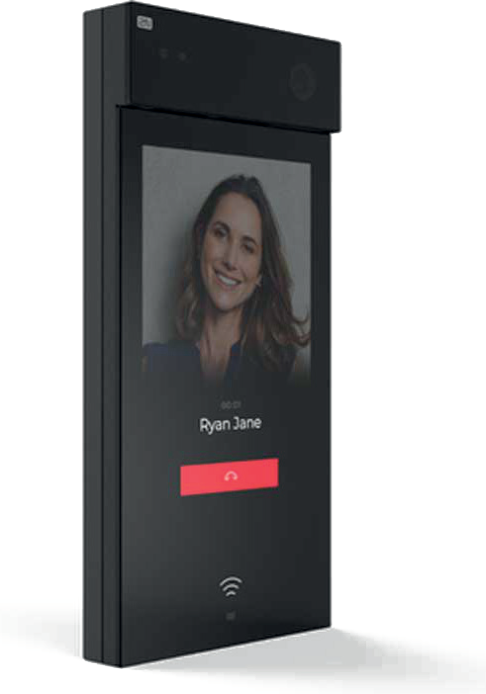
Section titled “2N IP Intercom Overview”This document uses the 2N IP One as the reference device to connect to CyberGate.
Compatibility
Section titled “Compatibility”All 2N IP Intercoms are compatible with CyberGate and support:
| Feature | Support |
|---|---|
| 2-way audio | ✅ All models |
| Video (outgoing) | ✅ Models with built-in camera |
| 2-way video | ✅ 2N IP Style only |
Security Features
Section titled “Security Features”The 2N IP Intercoms support secure connections to CyberGate using:
- SIP TLS (Transport Layer Security)
- SRTP (Secure Real-time Transport Protocol)
Note: The 2N IP Style interface differs slightly from other 2N intercoms. Not all screenshots represent the 2N IP Style.
Important: Please ensure the 2N intercom has the latest available firmware installed.
Document Contents
Section titled “Document Contents”| Section | Description |
|---|---|
| Configuration Steps | Steps to configure the 2N for CyberGate |
| Secure Connection | Enable encrypted SIP-TLS connection |
| Video Settings | Configure video codec settings |
| Directory Setup | Set up call destinations |
| Testing | Verify the configuration |
| Appendix: CyberGate App | Installation and usage of the CyberGate Teams app |
CyberGate Teams App Features
Section titled “CyberGate Teams App Features”The CyberGate app for Microsoft Teams provides:
- 🚪 Open door — Click a button to open the intercom door during a call
- 📊 Device status — View device online/offline status and initiate calls with one click
- 👥 Availability — Set your status in CyberGate Multi-ring groups
Recommendation: Installation of the CyberGate app for Microsoft Teams is highly recommended.
Configuration Steps
Section titled “Configuration Steps”Step 1: Connect to the 2N
Section titled “Step 1: Connect to the 2N”- Connect the 2N to the network
- Power it on
- Open a web browser and navigate to the device's IP address
- Sign in as 'admin' with the configured or supplied password
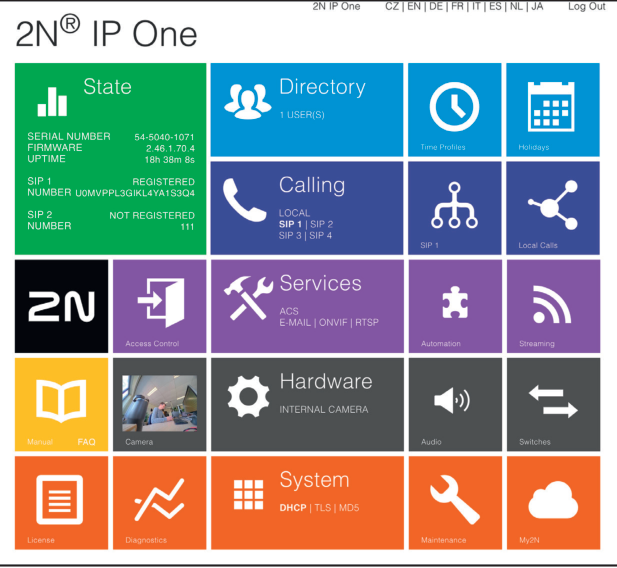
After successful login, the start screen will appear.
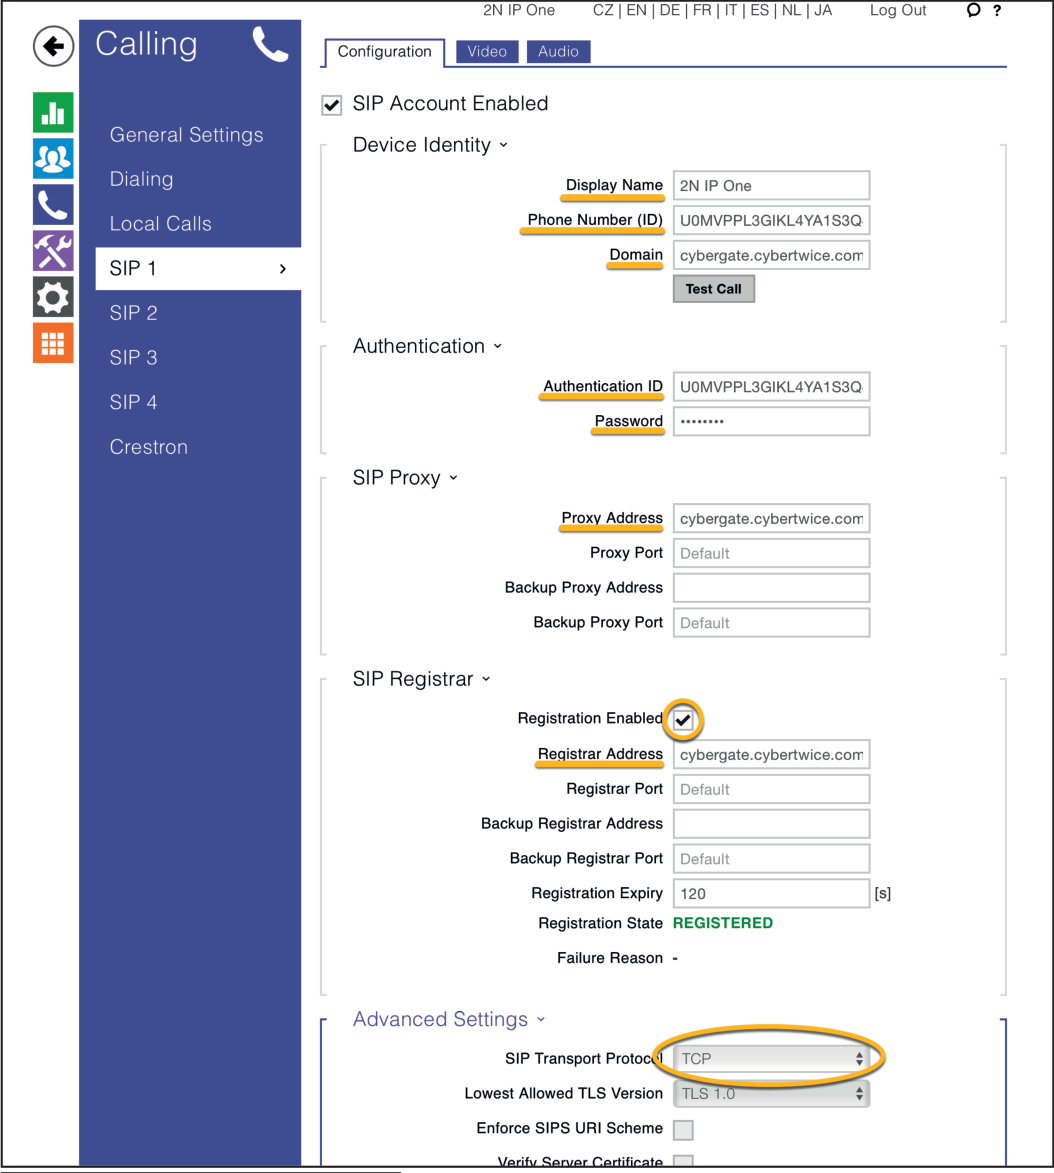
Step 2: Configure SIP Settings
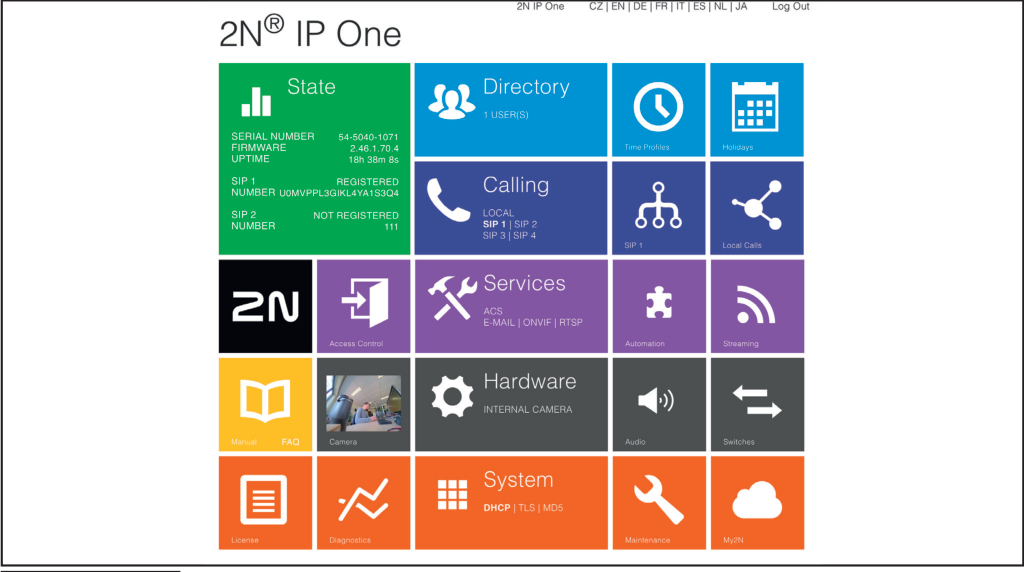
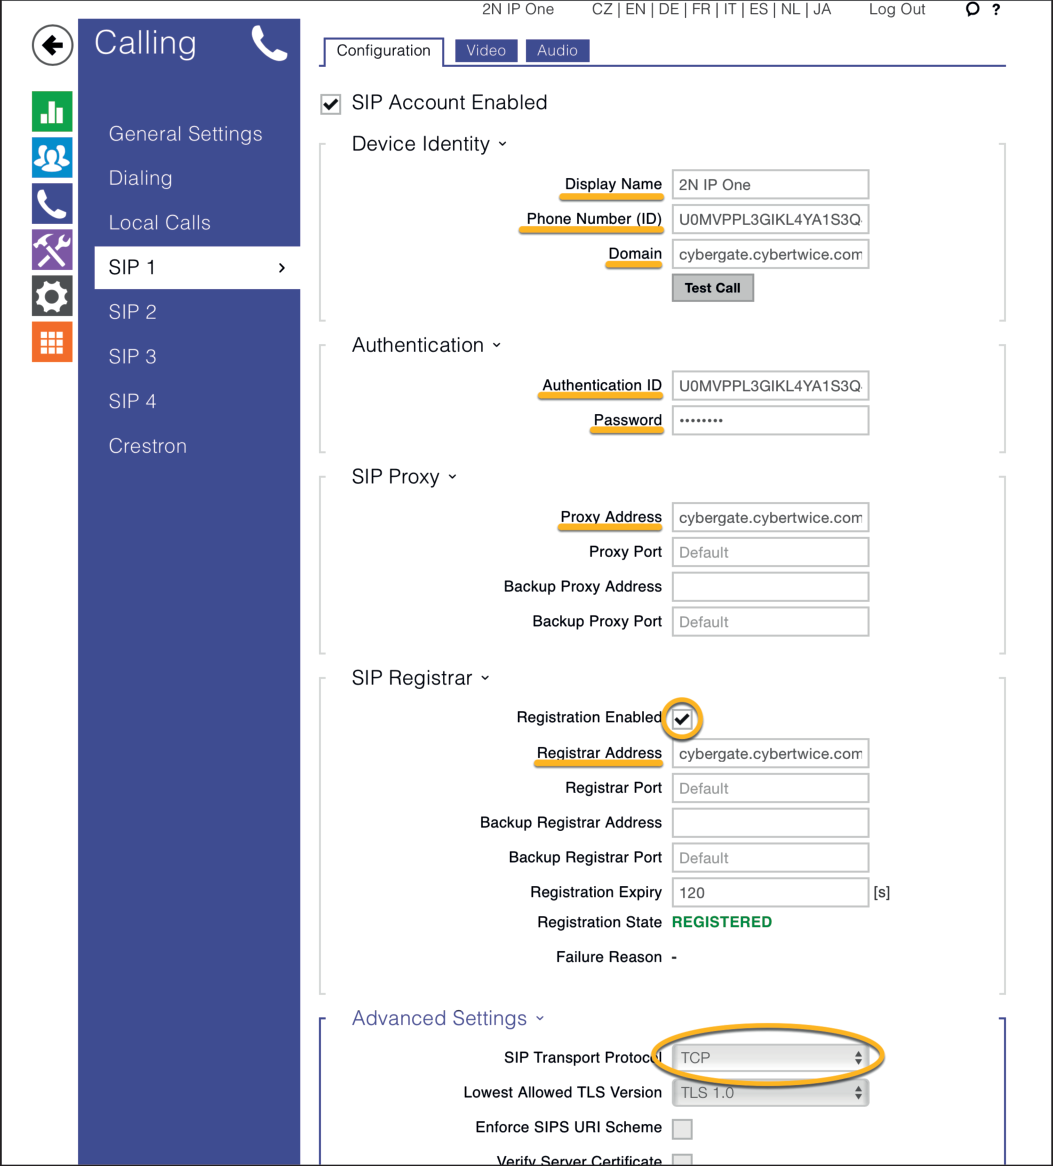
Section titled “Step 2: Configure SIP Settings”- Click on the blue 'Calling' tile
- Select 'SIP 1'
Configure the following settings:
Device Identity
Section titled “Device Identity”| Field | Value |
|---|---|
| Display name | Use a descriptive name for this account |
| Phone Number (ID) | Use the Username from CyberGate Management Portal |
| Domain | cybergate.cybertwice.com |
Authentication
Section titled “Authentication”| Field | Value |
|---|---|
| Use Authentication ID | ✅ Enable |
| Authorization ID | Use the Username from CyberGate Management Portal |
| Password | Use the Password from CyberGate Management Portal |
SIP Proxy
Section titled “SIP Proxy”| Field | Value |
|---|---|
| Proxy Address | cybergate.cybertwice.com |
SIP Registrar
Section titled “SIP Registrar”| Field | Value |
|---|---|
| Registration Enabled | ✅ Enable |
| Registrar Address | cybergate.cybertwice.com |
Advanced Settings (Standard Connection)
Section titled “Advanced Settings (Standard Connection)”| Field | Value |
|---|---|
| SIP Transport Protocol | TCP |
- Click 'Save' to register the 2N to CyberGate over TCP
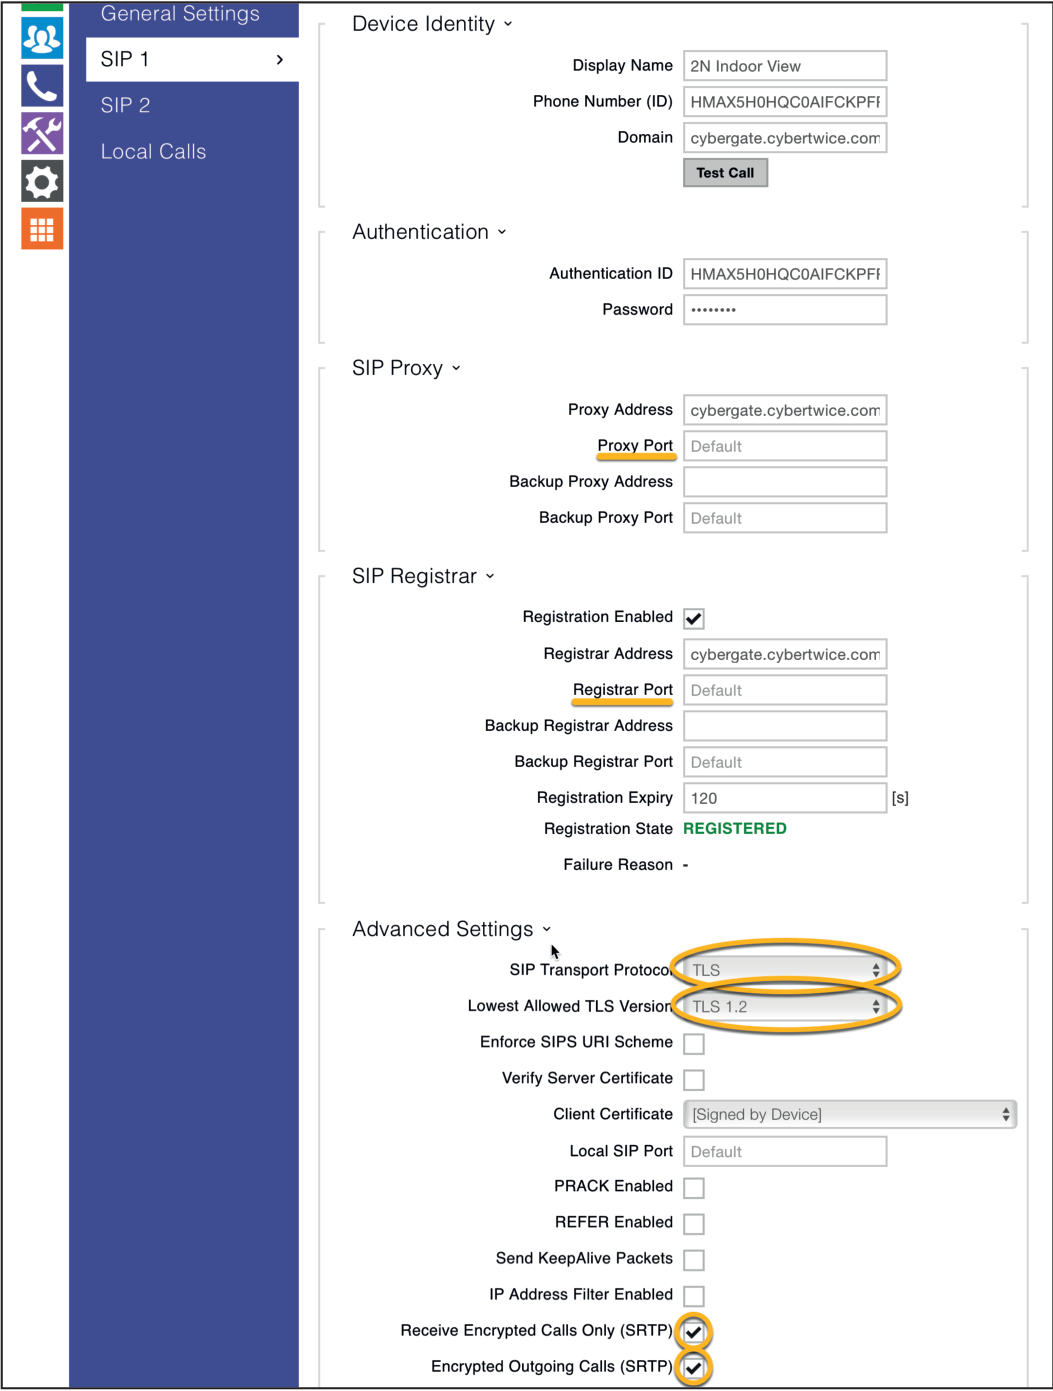
Step 3: Enable Secure Connection (Optional)
Section titled “Step 3: Enable Secure Connection (Optional)”For a secure connection, modify the following fields:
SIP Proxy
Section titled “SIP Proxy”| Field | Value |
|---|---|
| Proxy Port | 5061 (or keep 'Default') |
SIP Registrar
Section titled “SIP Registrar”| Field | Value |
|---|---|
| Registrar Port | 5061 (or keep 'Default') |
Advanced Settings
Section titled “Advanced Settings”| Field | Value |
|---|---|
| SIP Transport Protocol | TLS |
| Lowest Allowed TLS Version | TLS 1.2 |
| Receive Encrypted Calls Only (SRTP) | ✅ Enable |
| Encrypt Outgoing Calls (SRTP) | ✅ Enable |
Click 'Save' to register the 2N to CyberGate over TLS.

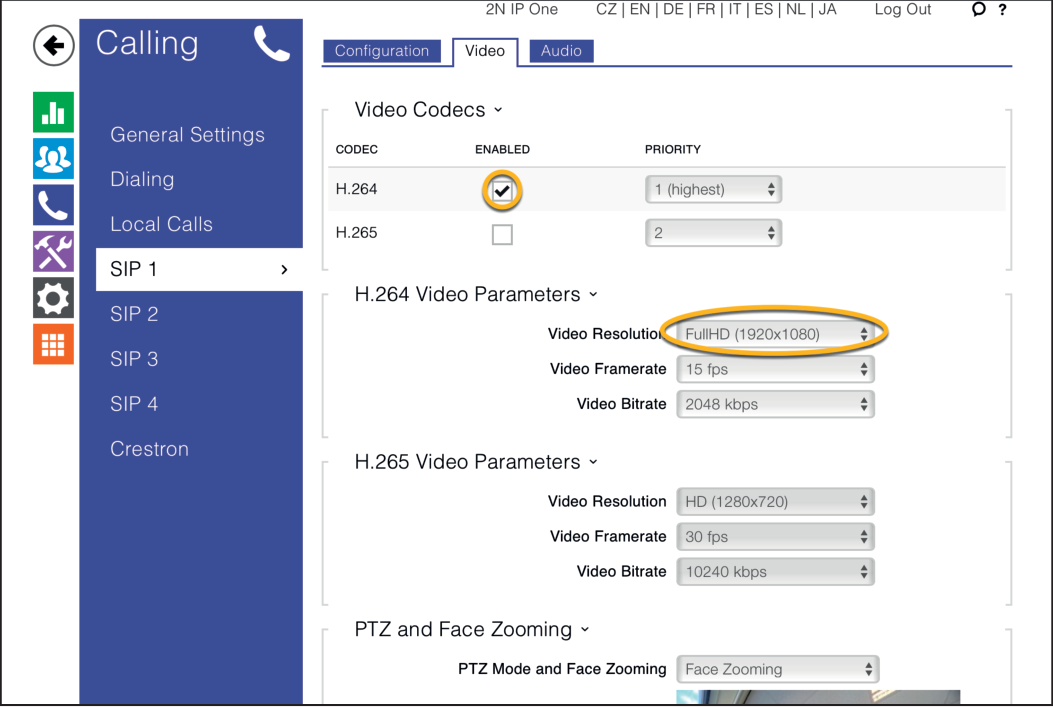
Step 4: Configure Video Settings
Section titled “Step 4: Configure Video Settings”- Navigate to 'Video'
- Configure the following settings:
Video Codecs
Section titled “Video Codecs”| Field | Value |
|---|---|
| H.263+ | ❌ Disable |
| H.263 | ❌ Disable |
| H.265 | ❌ Disable |
| H.264 Video Parameters | VGA (640x480) or higher resolution when available |
Bidirectional Video (2N IP Style only)
Section titled “Bidirectional Video (2N IP Style only)”| Field | Value |
|---|---|
| Enable Incoming Video | ✅ Enable |
| Display Outgoing Video | ✅ Enable |
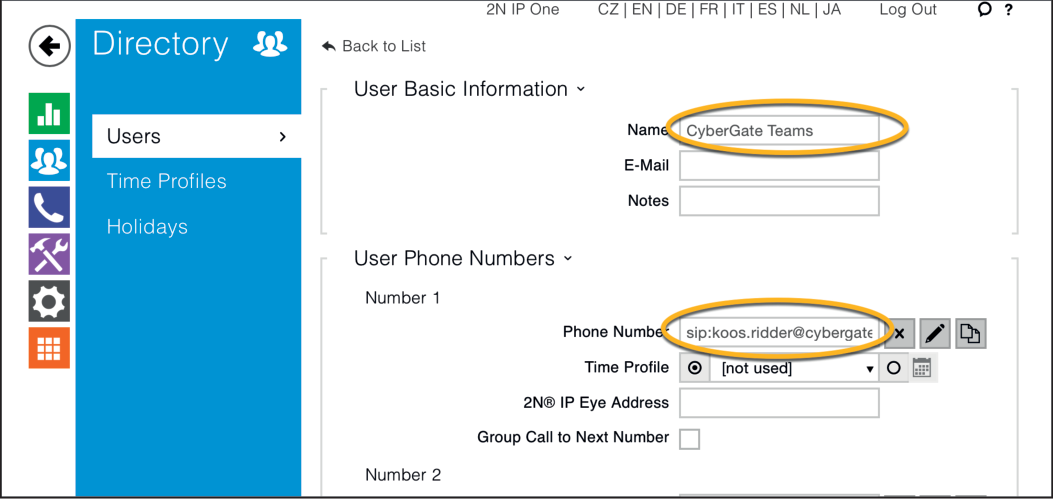
Step 5: Configure Directory (Call Destinations)
Section titled “Step 5: Configure Directory (Call Destinations)”- Navigate to the light-blue 'Directory' section
- Select 'Users'
In this section, you'll define one or more people to call.
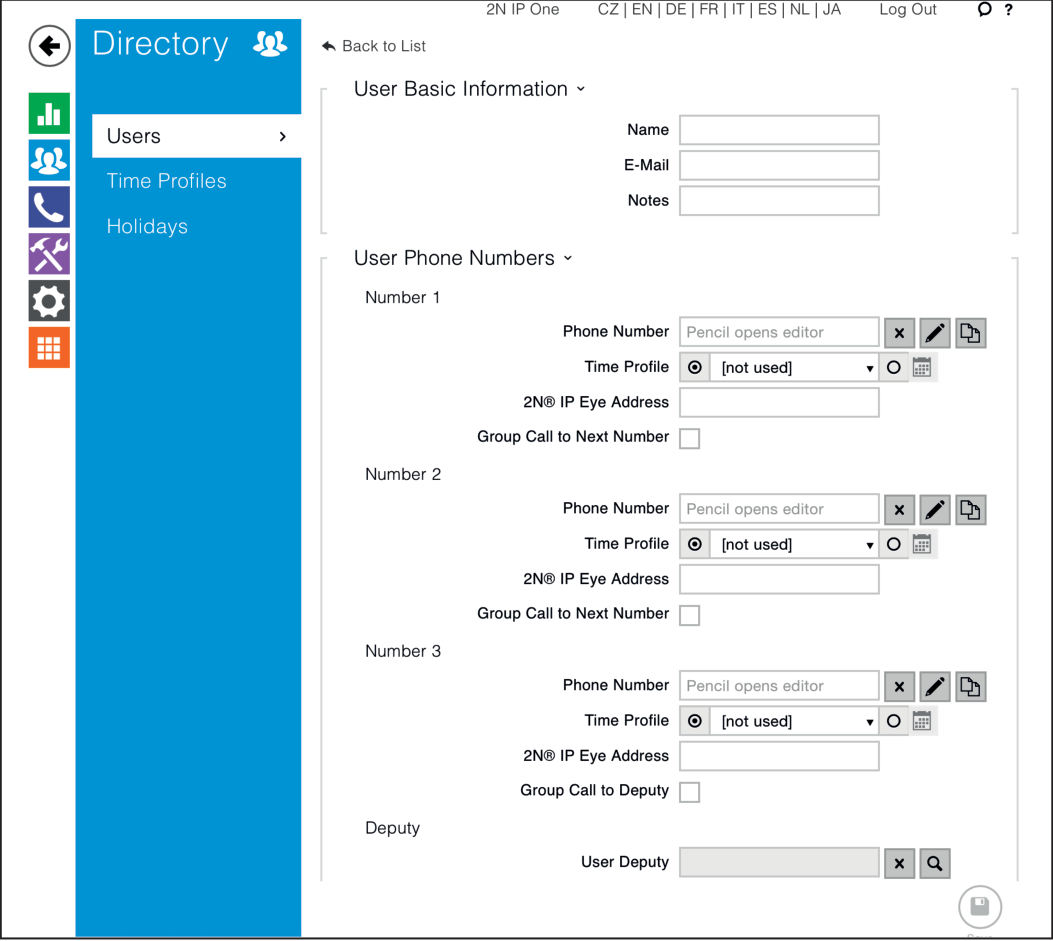

- Configure the following settings:
User Basic Information
Section titled “User Basic Information”| Field | Value |
|---|---|
| Name | Descriptive name for this directory entry |
User Phone Numbers
Section titled “User Phone Numbers”| Field | Value |
|---|---|
| Phone Number | Teams user address (see format below) |
Phone Number Format
Section titled “Phone Number Format”Use the format: sip:first.last@cybergate.cybertwice.com
Example:
For Teams user Koos Ridder with emailkoos.ridder@mycompany.com
Enter:sip:koos.ridder@cybergate.cybertwice.com
- Click 'Save' to save the directory entry
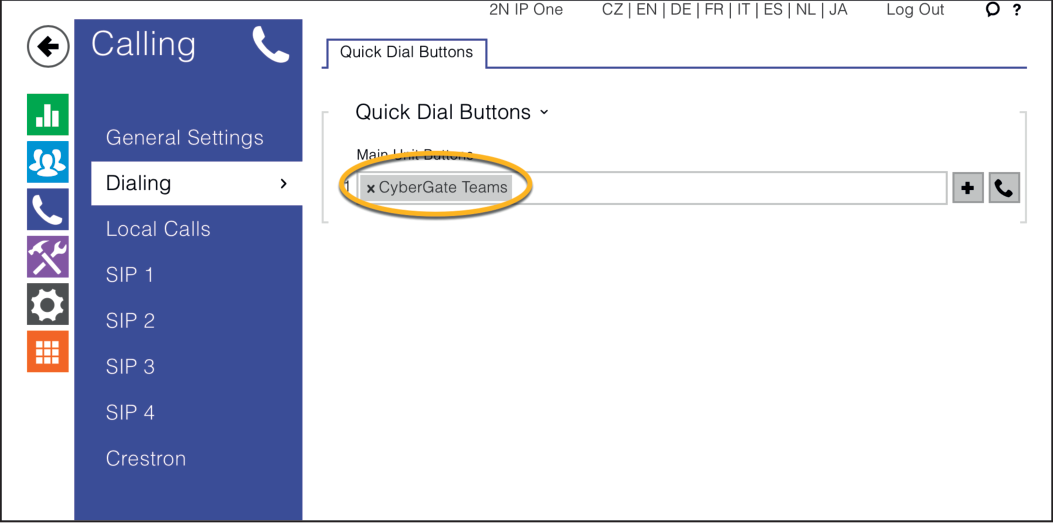
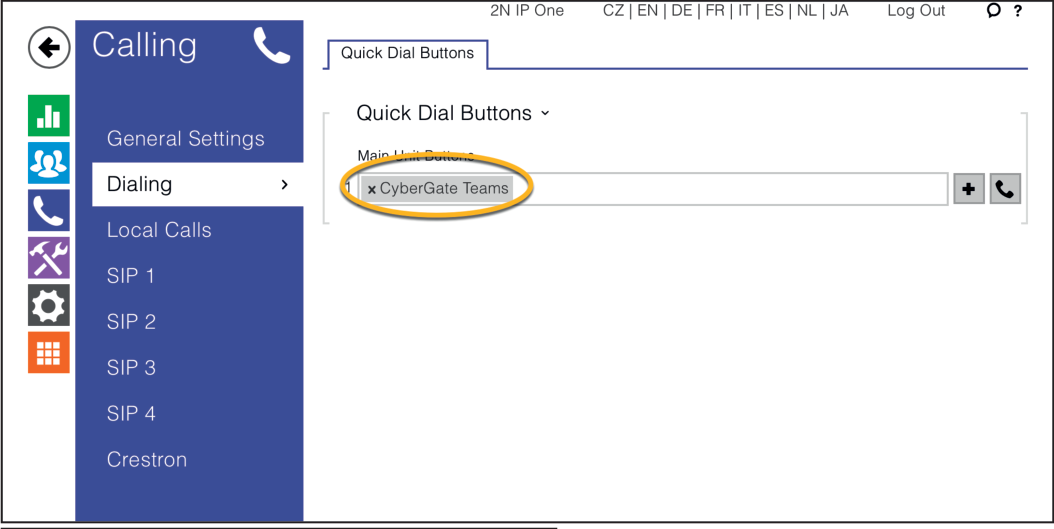
Step 6: Configure Quick Dial Button
Section titled “Step 6: Configure Quick Dial Button”- Navigate to the blue 'Calling' section
- Select 'Dialing'
- Using the '+' symbol, add the directory item you just created to the Quick Dial Buttons
This way, pressing the button on the 2N will create an outgoing call to the Teams user.
Testing the Configuration
Section titled “Testing the Configuration”Configuration of the 2N is now complete!
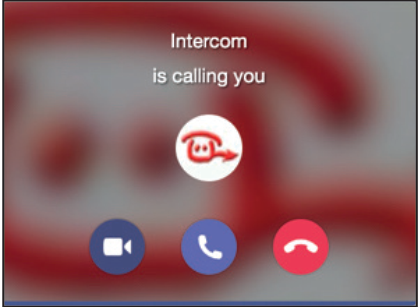
Making a Test Call
Section titled “Making a Test Call”- Press the button on the 2N to initiate a call to the configured Teams user
- If configured correctly, the Teams client will notify you of an incoming call
- Answer the call by clicking:
- The phone icon for audio only, or
- The camera symbol to initiate two-way video (for IP Style)
- The call will be established and video will be displayed
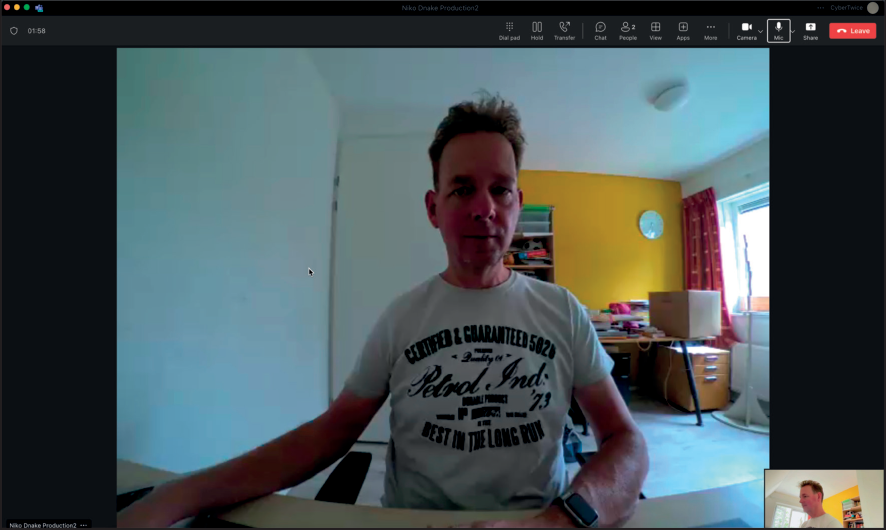
Opening the Door
Section titled “Opening the Door”To open the door from the Teams call:
- Click the 'Dial Pad' button in the Teams call bar
- Press 0* (by default) to trigger the relay of the 2N and open the door
Tip: For an easier door-opening experience, install the CyberGate Teams app which provides a dedicated Open Door button.
Quick Reference
Section titled “Quick Reference”CyberGate Connection Details
Section titled “CyberGate Connection Details”| Setting | Value |
|---|---|
| Domain | cybergate.cybertwice.com |
| Proxy Address | cybergate.cybertwice.com |
| Registrar Address | cybergate.cybertwice.com |
| SIP Transport (Standard) | TCP |
| SIP Transport (Secure) | TLS |
| TLS Port | 5061 |
| Minimum TLS Version | TLS 1.2 |
Teams User Address Format
Section titled “Teams User Address Format”sip:username@cybergate.cybertwice.comReplace username with the Teams user's email prefix (the part before @).
Recommended Video Settings
Section titled “Recommended Video Settings”| Setting | Value |
|---|---|
| Codec | H.264 |
| Resolution | VGA (640x480) or higher |
| H.263/H.263+/H.265 | Disabled |
Document History
Section titled “Document History”| Version | Date | Author | Change |
|---|---|---|---|
| 1.0.0 | — | KR | Initial version |
| 1.0.6 | 2025-08-06 | KR | Current version |