This document describes how to configure the 2N IP Indoor View to connect to the CyberGate service.
Use Cases
Section titled “Use Cases”| Scenario | Supported |
|---|---|
| Call from 2N Indoor View → Teams user or Multi-ring group | ✅ Yes |
| Call from Teams user → 2N Indoor View | ✅ Yes |
| Call from 2N IP Door Intercom ↔ 2N Indoor View via CyberGate | ❌ No |
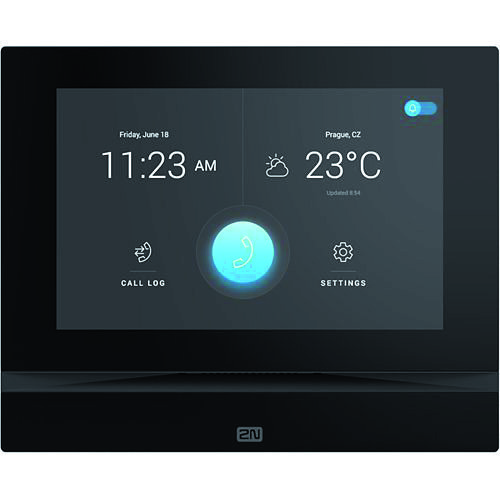
Important: The 2N Indoor View is not equipped with a camera, so connections are two-way audio only.
Security Features
Section titled “Security Features”The 2N IP Indoor View supports secure connections to CyberGate using:
- SIP TLS (Transport Layer Security)
- SRTP (Secure Real-time Transport Protocol) sdfdsgfxdf
Configuration Steps
Section titled “Configuration Steps”Step 1: Connect to the 2N
Section titled “Step 1: Connect to the 2N”- Connect the 2N to the network
- Power it on
- Open a web browser and navigate to the device's IP address
- Sign in as 'admin' with the configured or supplied password
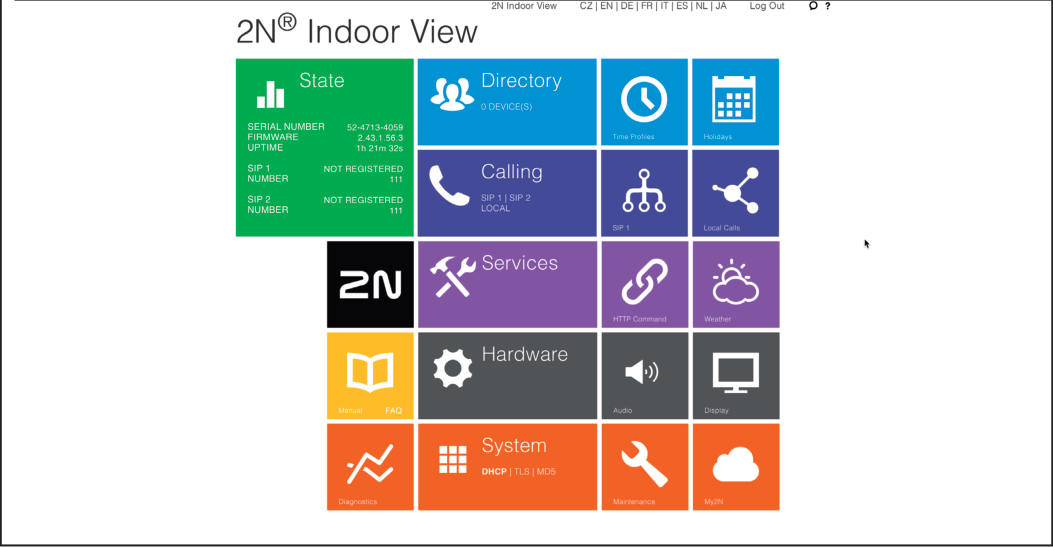
After successful login, the start screen will appear.
Step 2: Configure SIP Settings
Section titled “Step 2: Configure SIP Settings”- Click on the blue 'Calling' tile
- Open the SIP 1 settings
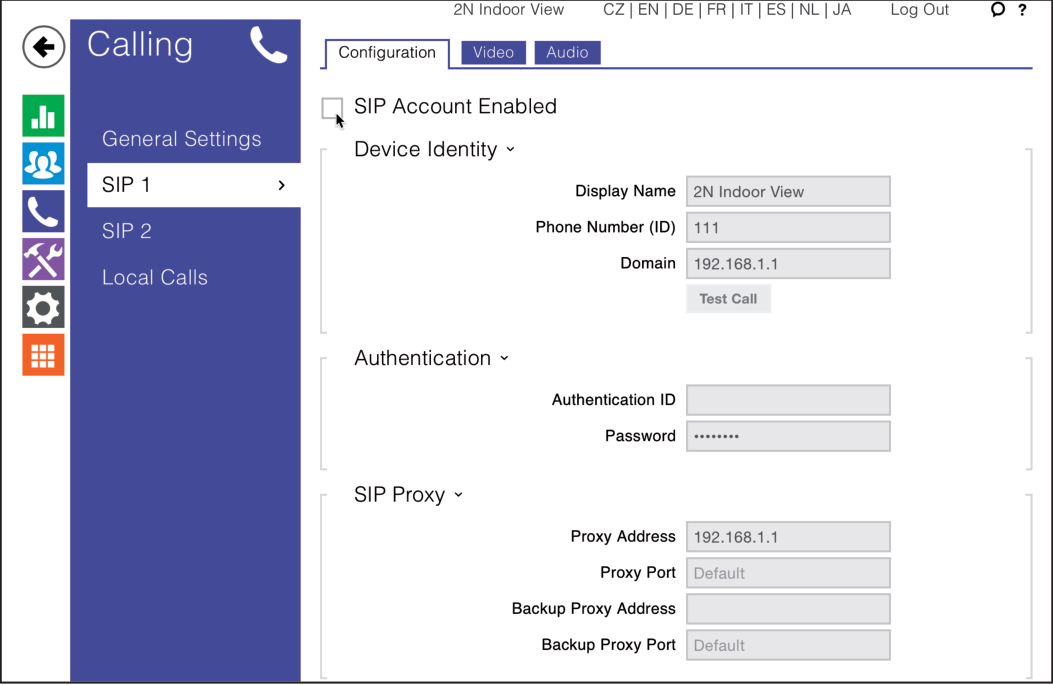
Configure the following settings:
Device Identity
Section titled “Device Identity”| Field | Value |
|---|---|
| Display name | Use a descriptive name for this account |
| Phone Number (ID) | Use the Username from CyberGate Management Portal |
| Domain | cybergate.cybertwice.com |
Authentication
Section titled “Authentication”| Field | Value |
|---|---|
| Authorization ID | Use the Username from CyberGate Management Portal |
| Password | Use the Password from CyberGate Management Portal |
SIP Proxy
Section titled “SIP Proxy”| Field | Value |
|---|---|
| Proxy Address | cybergate.cybertwice.com |
SIP Registrar
Section titled “SIP Registrar”| Field | Value |
|---|---|
| Registration Enabled | ✅ Enable |
| Registrar Address | cybergate.cybertwice.com |
Advanced Settings (Standard Connection)
Section titled “Advanced Settings (Standard Connection)”| Field | Value |
|---|---|
| SIP Transport Protocol | TCP |
- Click 'Save' to register the 2N to CyberGate over TCP
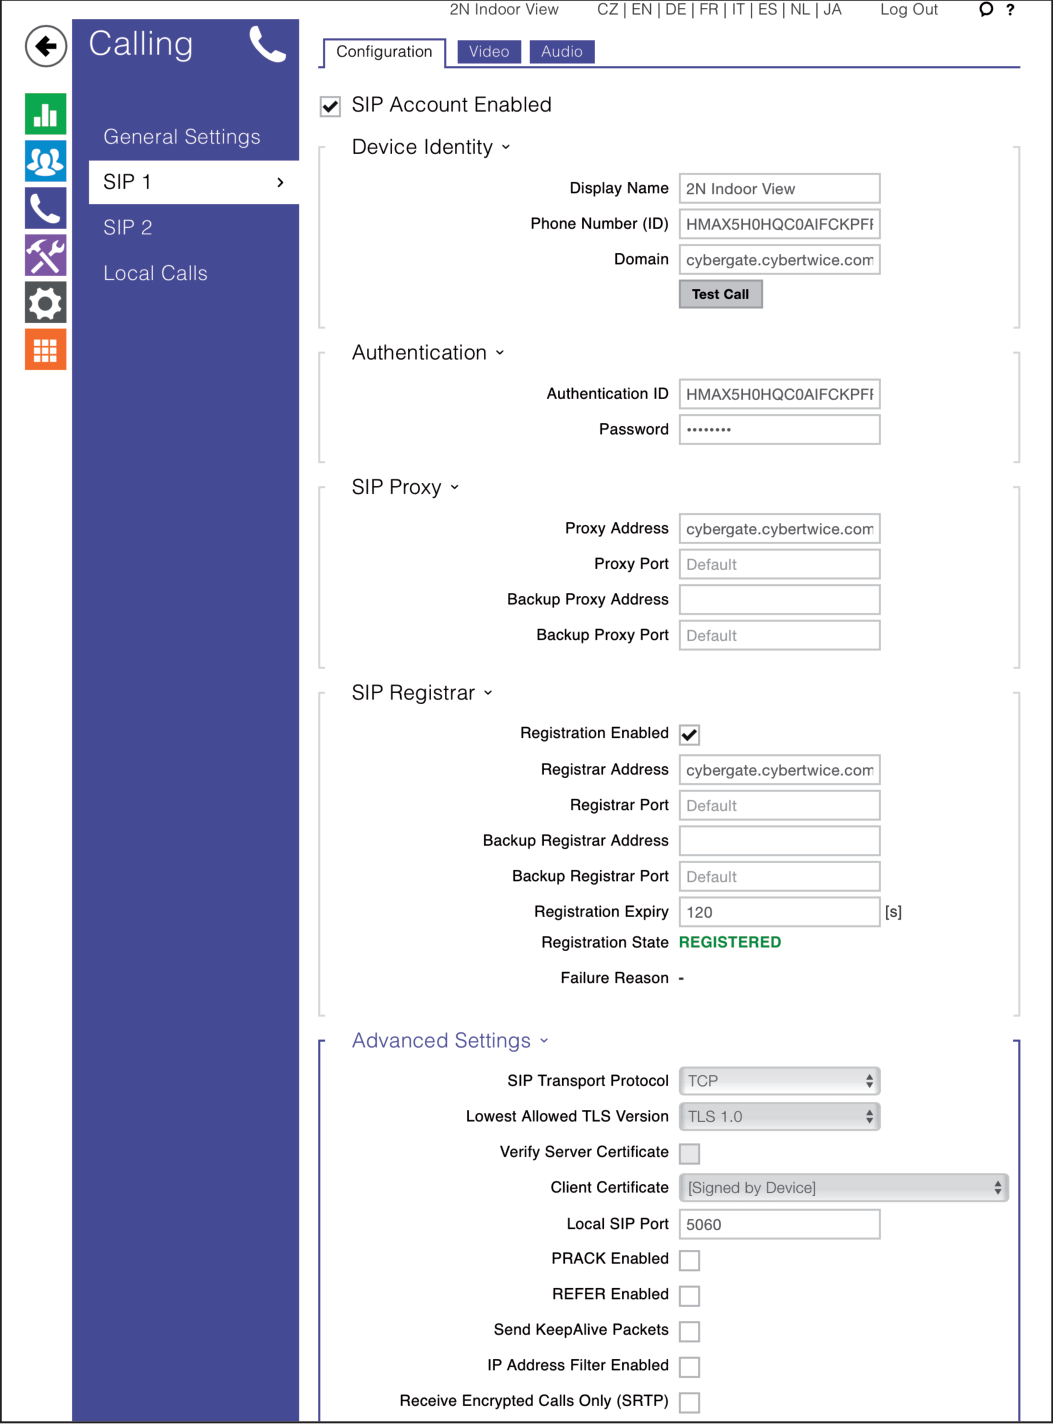
Step 3: Enable Secure Connection (Optional)
Section titled “Step 3: Enable Secure Connection (Optional)”For a secure connection, modify the following fields in Advanced Settings:
| Field | Value |
|---|---|
| SIP Transport Protocol | TLS |
| Lowest Allowed TLS Version | TLS 1.2 |
| Receive Encrypted Calls Only (SRTP) | ✅ Enable |
| Encrypt Outgoing Calls (SRTP) | ✅ Enable |
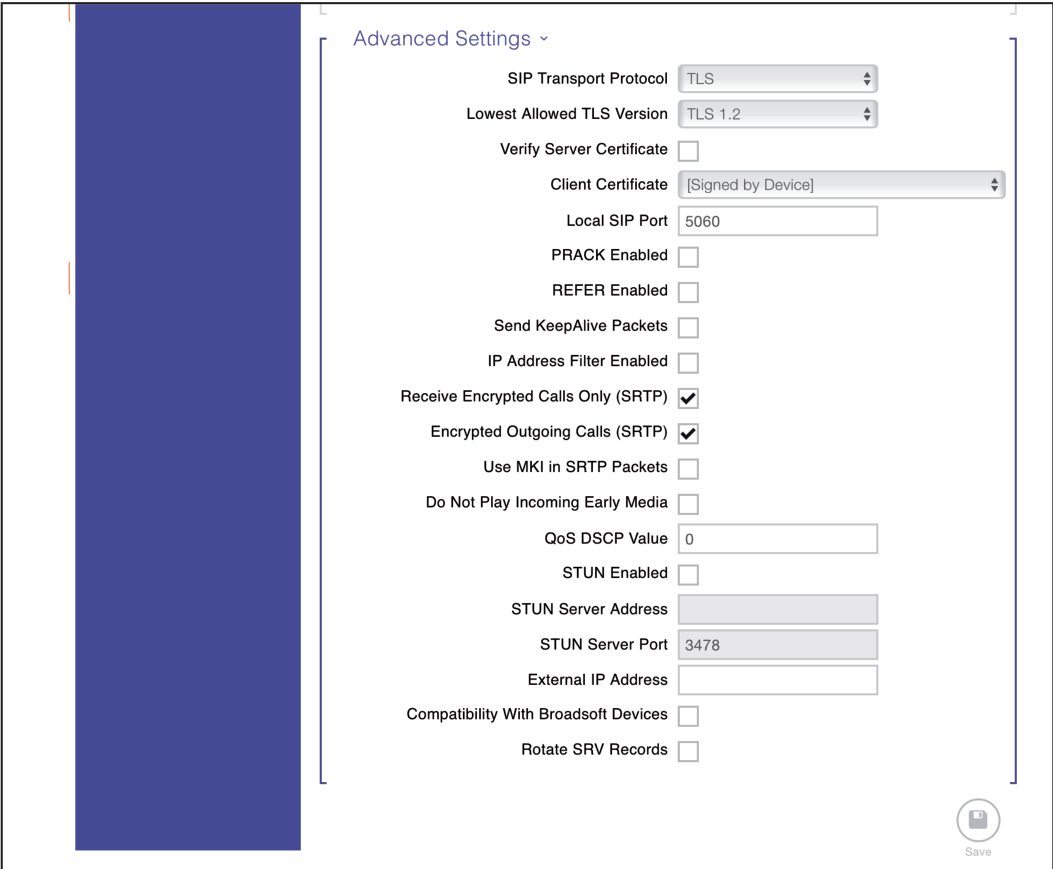
Click 'Save' to register the 2N to CyberGate over TLS.
Step 4: Configure Directory (Call Destinations)
Section titled “Step 4: Configure Directory (Call Destinations)”- Navigate to the blue 'Directory' section
- Select 'Devices'
In this section, you'll define one or more people to call.
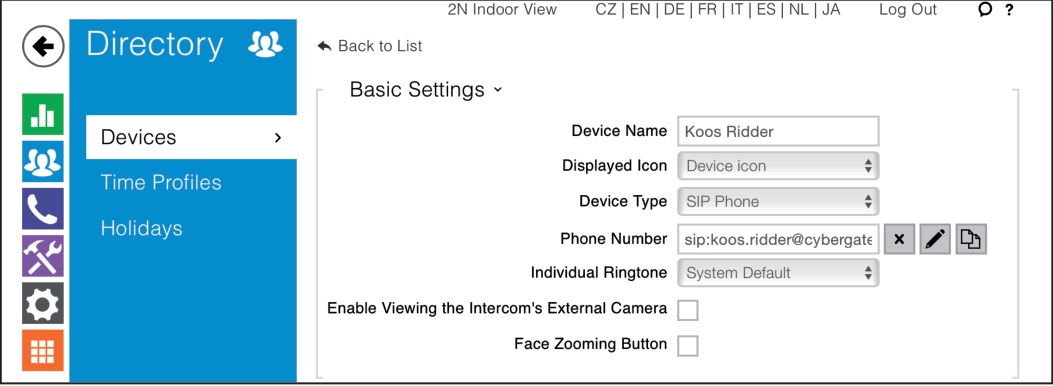
Basic Settings
Section titled “Basic Settings”| Field | Value |
|---|---|
| Device Name | Descriptive name for this directory entry |
| Phone Number | Teams user address (see format below) |
Phone Number Format
Section titled “Phone Number Format”Use the format: sip:first.last@cybergate.cybertwice.com
Example:
For Teams user Koos Ridder with emailkoos.ridder@mycompany.com
Enter:sip:koos.ridder@cybergate.cybertwice.com
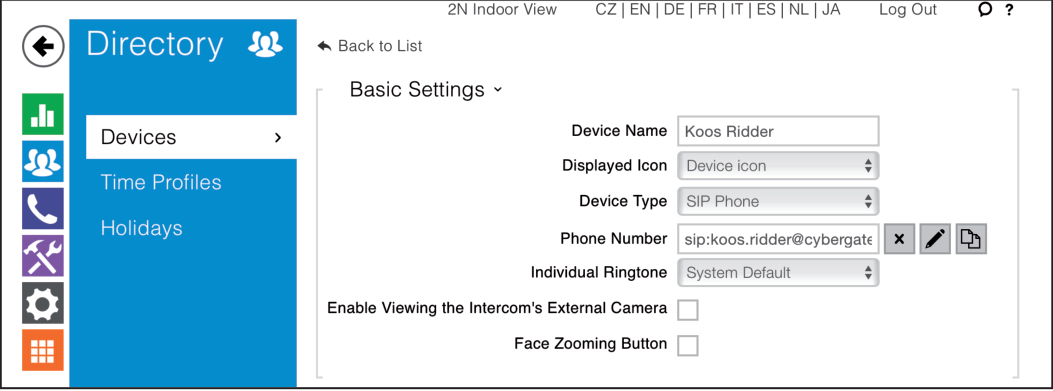
Click 'Save' to save the directory entry.
Testing the Configuration
Section titled “Testing the Configuration”Configuration of the 2N is now complete!
Making a Test Call
Section titled “Making a Test Call”- Press the call button on the display of the 2N to initiate a call to the configured Teams user
- If configured correctly, the Teams client will notify you of an incoming call
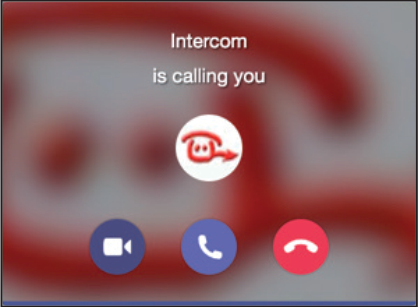
- Answer the call by clicking the phone icon
- The call will now be established
Quick Reference
Section titled “Quick Reference”CyberGate Connection Details
Section titled “CyberGate Connection Details”| Setting | Value |
|---|---|
| Domain | cybergate.cybertwice.com |
| Proxy Address | cybergate.cybertwice.com |
| Registrar Address | cybergate.cybertwice.com |
| SIP Transport (Standard) | TCP |
| SIP Transport (Secure) | TLS 1.2 |
Teams User Address Format
Section titled “Teams User Address Format”sip:username@cybergate.cybertwice.comReplace username with the Teams user's email prefix (the part before @).
Document History
Section titled “Document History”| Version | Date | Author | Change |
|---|---|---|---|
| 1.0.0 | 2024-05-21 | KR | Initial version |
| 1.0.1 | 2024-10-28 | KR | Updated layout |