Genetec Sipelia
Version: 1.0.2 ENG
Date: May 2, 2025
Product: CyberTwice CyberGate with Genetec Sipelia
Sipelia Overview
Section titled “Sipelia Overview”
Document Contents
Section titled “Document Contents”| Section | Description |
|---|---|
| Part 1: CyberGate Configuration | Configure SIP trunk and Multi-ring groups in CyberGate |
| Part 2: Sipelia Configuration | Configure Sipelia to connect to CyberGate |
| Part 3: Final Steps | Complete setup and run Feature Configuration script |
| Appendix: CyberGate App | Installation and usage of the CyberGate Teams app |
Prerequisites
Section titled “Prerequisites”Before starting, ensure the following:
- CyberGate has been purchased in the Azure Marketplace or Microsoft AppSource
- CyberGate has been activated after purchasing
- Consent has been provided in the CyberGate Management Portal
- CyberGate has the Public WAN IP address used by Sipelia for whitelisting
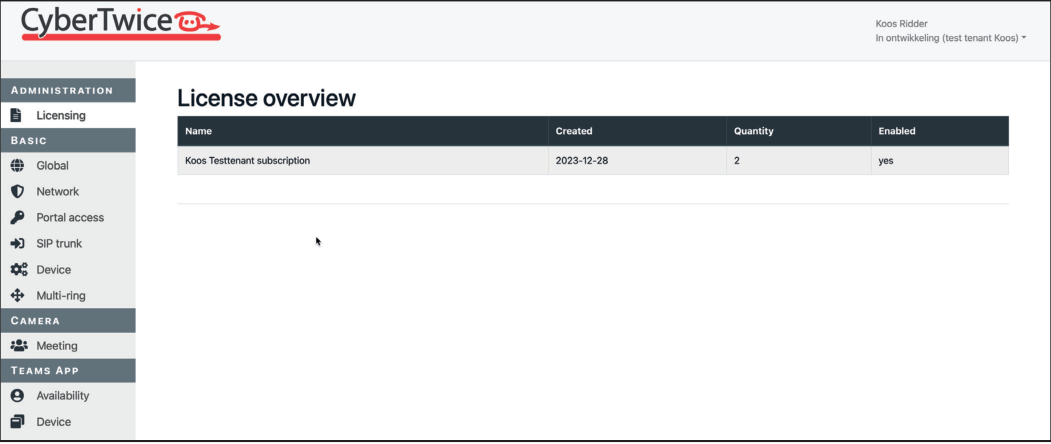
- You have enough CyberGate licenses for all devices that will connect to Teams via Sipelia
Part 1: Configuration of CyberGate
Section titled “Part 1: Configuration of CyberGate”The connection between Sipelia and CyberGate runs over a SIP trunk. This SIP trunk must be added and configured in CyberGate first. Sipelia uses the CyberGate Multi-ring group feature to call one or multiple Teams users simultaneously.
Step 1: Log in to CyberGate Management Portal
Section titled “Step 1: Log in to CyberGate Management Portal”Navigate to https://admin.cybergate.cybertwice.com and log in.
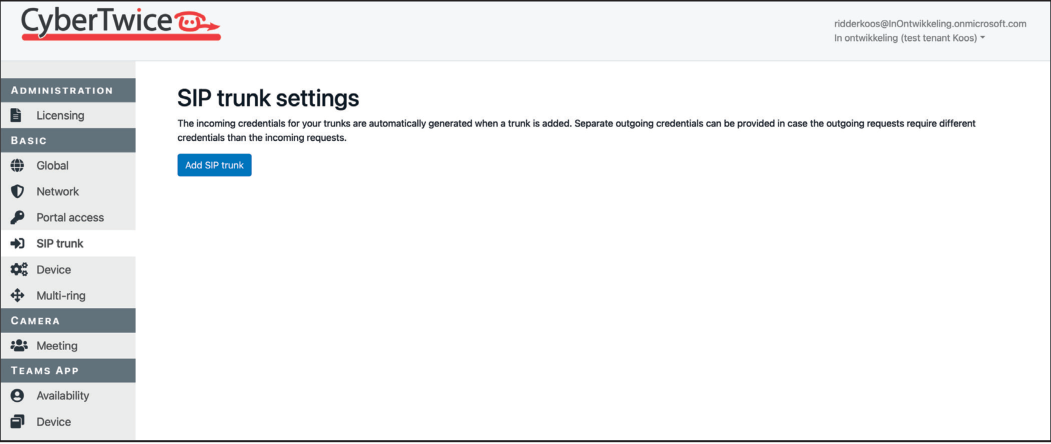
Step 2: Add SIP Trunk
Section titled “Step 2: Add SIP Trunk”- Navigate to the SIP trunk menu
-
Click the blue ‘Add SIP trunk’ button
-
Configure the following:
| Field | Value |
|---|---|
| Name | Name the SIP trunk (e.g., Sipelia) |
- Click ‘Add’

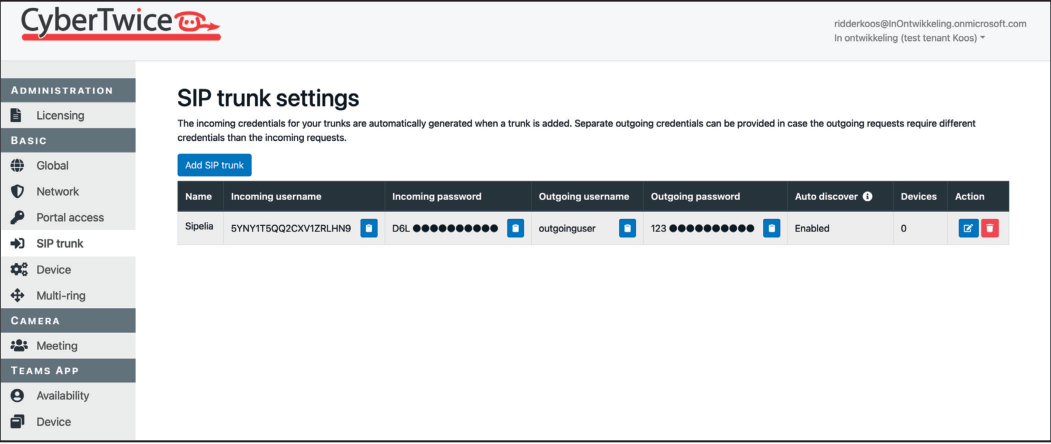
Step 3: Configure SIP Trunk Authentication
Section titled “Step 3: Configure SIP Trunk Authentication”- Click the blue edit button on the newly created SIP trunk
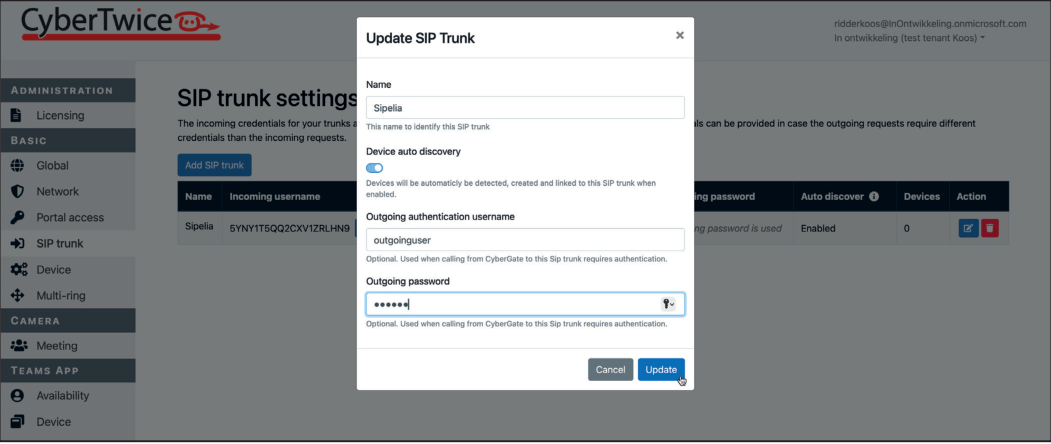
- Configure the outgoing authentication credentials:
| Field | Value |
|---|---|
| Outgoing authentication username | Define a username for CyberGate to authenticate to Sipelia |
| Outgoing password | Define a password for CyberGate to authenticate to Sipelia |
- Click ‘Update’
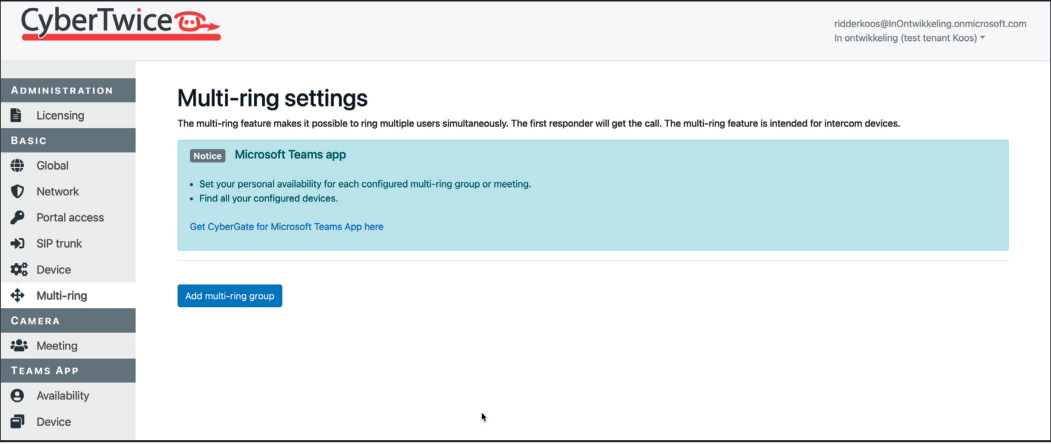
Step 4: Create Multi-ring Group
Section titled “Step 4: Create Multi-ring Group”- Navigate to the Multi-ring menu
-
Click the blue ‘Add multi-ring group’ button
-
Configure the following:
| Field | Value |
|---|---|
| Name | Name the Multi-ring group (e.g., 5001) |
| Description | A descriptive name for the users that will be called |
- Click ‘Add’

Step 5: Add Teams Users to Multi-ring Group
Section titled “Step 5: Add Teams Users to Multi-ring Group”After creating the Multi-ring group, add the required Teams users to this group.
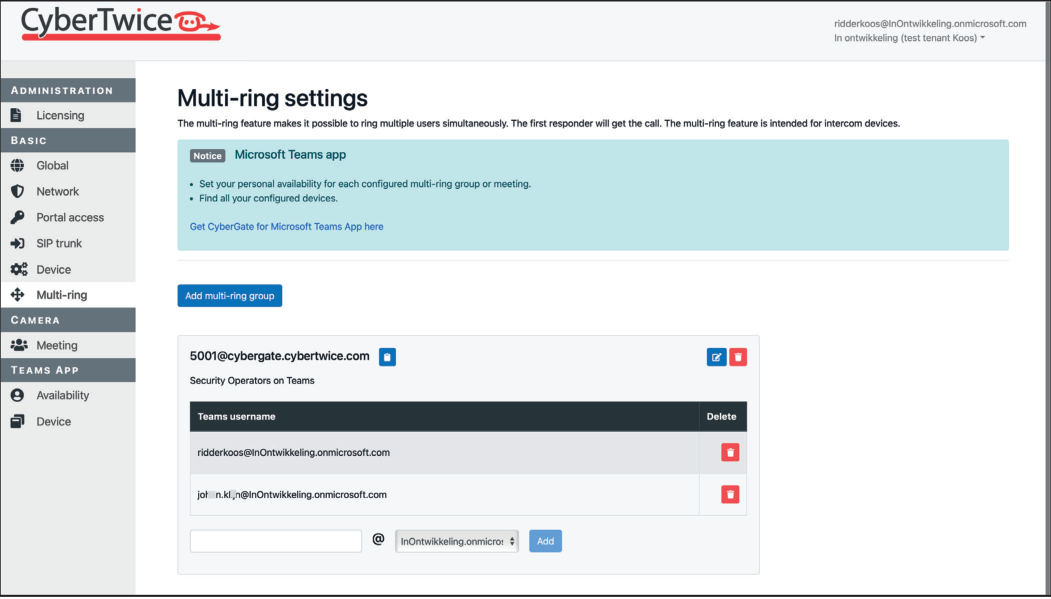
You can add as many Multi-ring groups as you have destinations to call. The CyberGate Management Portal configuration is now complete. Continue with the Sipelia configuration.
Part 2: Configuration of Sipelia
Section titled “Part 2: Configuration of Sipelia”The configuration of Sipelia for use with CyberGate consists of four steps:
- Creation of a SIP trunk
- Creation of a Dial Plan rule
- Creation of a range of extensions for CyberGate
- Adding an account to Security Center Sipelia
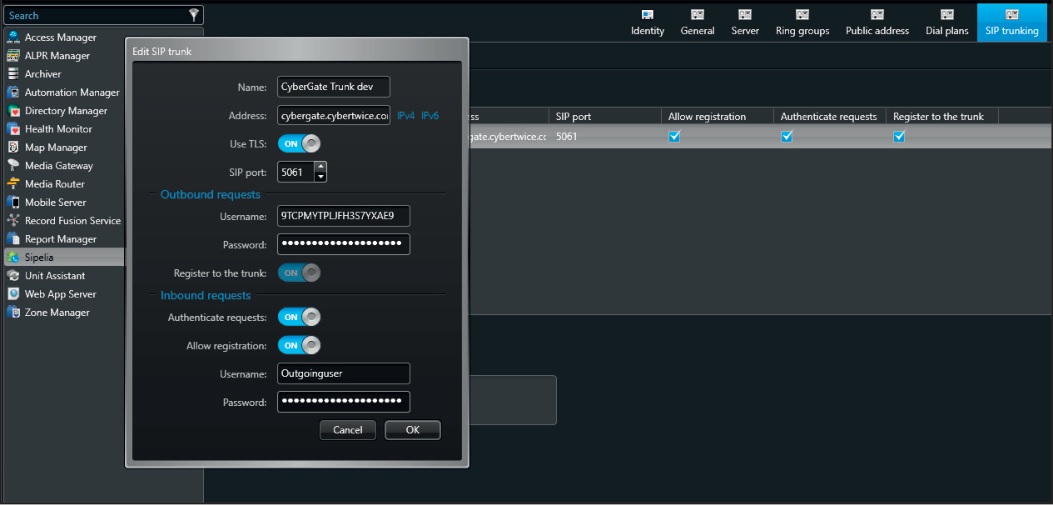
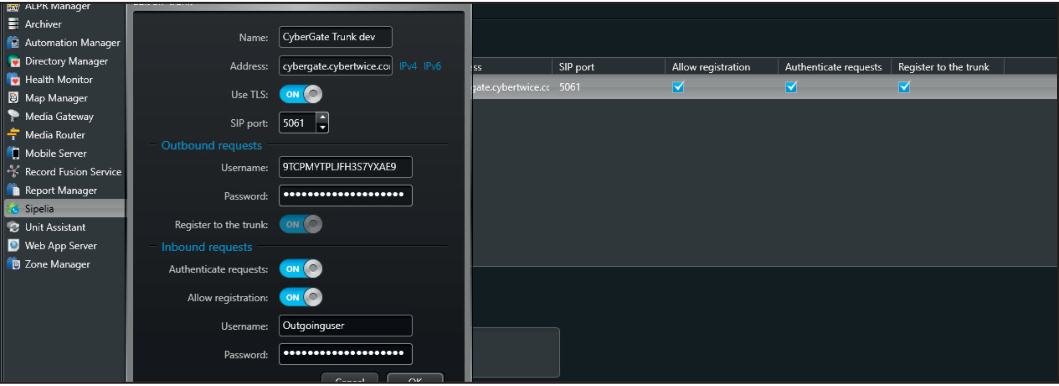
Step 1: Create SIP Trunk in Sipelia
Section titled “Step 1: Create SIP Trunk in Sipelia”-
Under the SIP trunking tab, click on the + sign to add a SIP trunk
-
Give the SIP trunk a name
-
(Optional) Enable TLS for secure communication
-
(Optional) If using TLS, set SIP port to
5061 -
Under Outbound requests, enter the incoming username and password copied from the CyberGate Management Portal (from Step 3 above)
-
Enable registration to the trunk
-
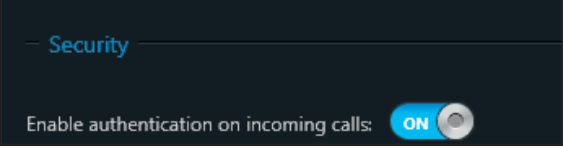
(Optional) Under Inbound requests, enable Authenticate requests for additional security
Note: Authentication on incoming calls must be enabled under the General tab of Sipelia for this security feature to work.
-
Enable Allow registration
-
Under Inbound requests, enter the outgoing username and password from CyberGate
-
Click OK
-
Click Apply
The trunk state should turn green, indicating it’s online.

Step 2: Create Dial Plan Rule
Section titled “Step 2: Create Dial Plan Rule”-
Under Dial plans, use one of the available templates
-
Modify the rule accordingly
-
Configure the Direction to be the CyberGate SIP trunk
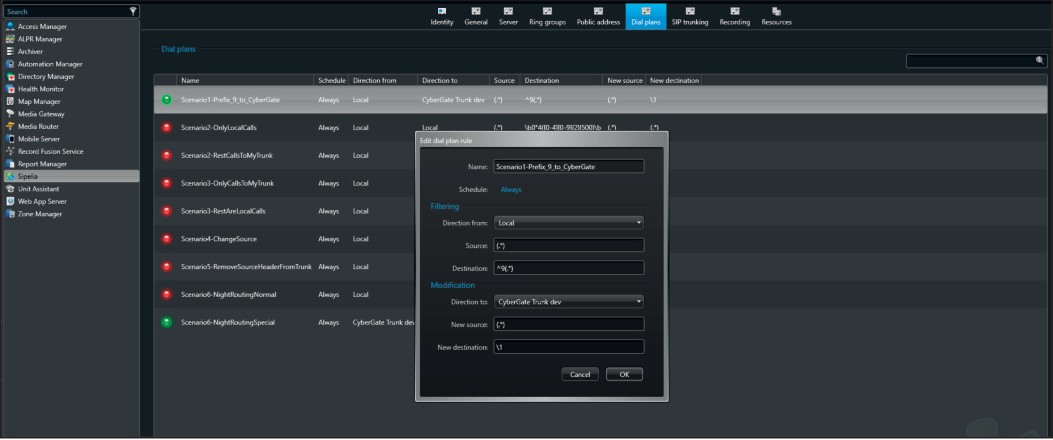
-
Click OK
-
Click on the green dot (•) to activate the rule
-
Click Apply
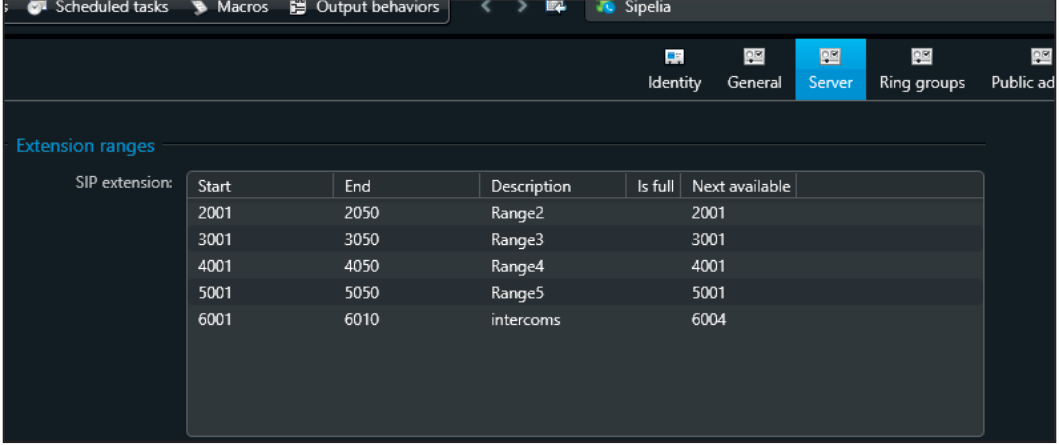
Step 3: Create Extension Range for CyberGate
Section titled “Step 3: Create Extension Range for CyberGate”Create a range of extensions defined within your dial plan to call Teams users or user groups.
-
Go to the Extension ranges section under the Server tab
-
Click the + sign to add a range
-
Select a start and end for your extension range
-
(Optional) Add a description
-
Add a password
Step 4: Add Account to Security Center Sipelia
Section titled “Step 4: Add Account to Security Center Sipelia”To identify Teams users in the Sipelia address book, you must add the Multi-ring groups created in CyberGate as SIP intercoms in Security Center Sipelia.
-
From the Config Tool homepage, select the Sipelia plugin role
-
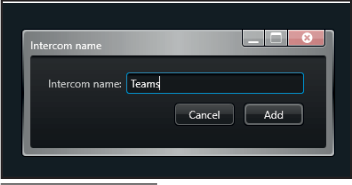
At the bottom of the page, click Add intercom
-
Enter a name and click Add
-
Click the VoIP tab and assign a SIP extension and password to your SIP Teams virtual user group
Option A: Auto-assign extension
- Click Auto-assign and choose the existing designated range of SIP extensions for Teams users
- The SIP intercom is automatically assigned to the next available extension with the correct password
Option B: Manual assignment
- SIP extension: Enter the extension number
- Password: Enter the password specified when creating the extension range
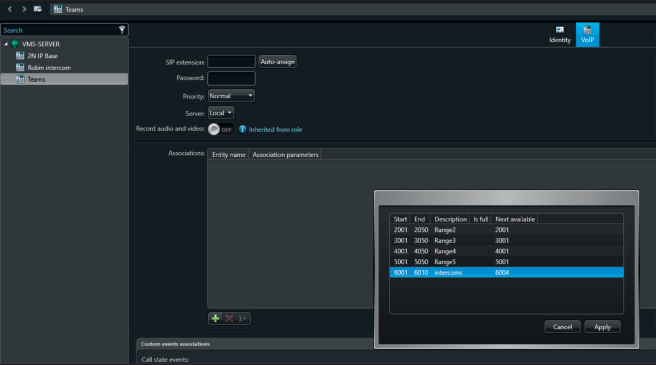
-
Under Server, select the SIP trunk name previously created for CyberGate
-
Click Apply
-
Repeat steps 1-6 for each Multi-ring group created in CyberGate
Verify Configuration
Section titled “Verify Configuration”The virtual intercoms for the Teams Multi-ring groups should display an online status with a green dot in Security Desk.
Each created virtual intercom has an extension assigned to it. Dialing this extension using Sipelia will trigger an outgoing call to CyberGate, which corresponds to a Multi-ring group, and users in that group will be called.
Part 3: Final Steps in CyberGate
Section titled “Part 3: Final Steps in CyberGate”After the Sipelia configuration is complete, calls can be made to Teams users via CyberGate. All devices registered to Sipelia (including Security Desk users) used to call Teams via CyberGate will be added to CyberGate automatically.
Important: All devices added to CyberGate require corresponding licenses. For example, if you use 5 devices to call Teams destinations, you need 5 CyberGate licenses.
Run Feature Configuration Script
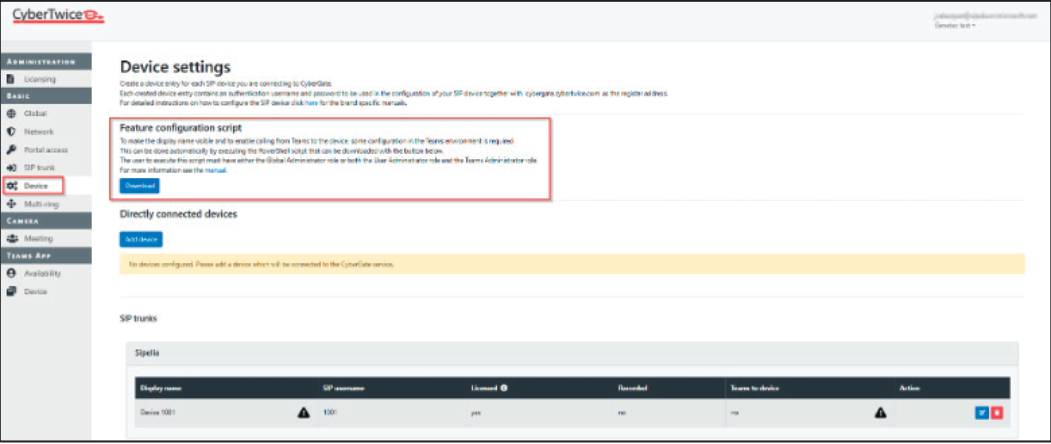
Section titled “Run Feature Configuration Script”Once all devices are created, download and run the PowerShell Feature Configuration script. This script enables display names to show in the Teams environment and is required to enable outgoing calls from Teams to devices in Sipelia.
- Navigate to Basic → Devices menu to see all detected devices
-
Click the blue ‘Download’ button to download the Feature Configuration Script
-
Run the script in PowerShell with administrator privileges
This will also remove the exclamation marks in the Basic → Devices menu.
Quick Reference
Section titled “Quick Reference”CyberGate Connection Details
Section titled “CyberGate Connection Details”| Setting | Value |
|---|---|
| Management Portal | https://admin.cybergate.cybertwice.com |
| SIP Port (Standard) | 5060 |
| SIP Port (TLS) | 5061 |
Configuration Workflow Summary
Section titled “Configuration Workflow Summary”| Step | Location | Action |
|---|---|---|
| 1 | CyberGate Portal | Add SIP trunk with authentication credentials |
| 2 | CyberGate Portal | Create Multi-ring groups and add Teams users |
| 3 | Sipelia | Create SIP trunk pointing to CyberGate |
| 4 | Sipelia | Create dial plan rule for CyberGate trunk |
| 5 | Sipelia | Create extension range for Teams calls |
| 6 | Sipelia | Add virtual intercoms for each Multi-ring group |
| 7 | CyberGate Portal | Run Feature Configuration PowerShell script |
Appendix - CyberGate Teams App
Section titled “Appendix - CyberGate Teams App”Requirements
Section titled “Requirements”To use the CyberGate App, you need a subscription to one of the following CyberGate SaaS solutions:
- ✅ CyberGate for IP Cameras with Teams
- ✅ CyberGate for IP Paging with Teams
- ✅ CyberGate for IP Intercoms with Teams
App Features Overview
Section titled “App Features Overview”The CyberGate Teams app provides three main features:
| Feature | Description |
|---|---|
| Availability | Set your availability status in Multi-ring groups |
| Devices | View device status and initiate calls with one click |
| Door Open | Open doors during calls with a single button click |
Installation
Section titled “Installation”How to Install
Section titled “How to Install”-
Open Microsoft Teams and click on the ‘Apps’ button in the sidebar
-
Search for ‘cybergate’
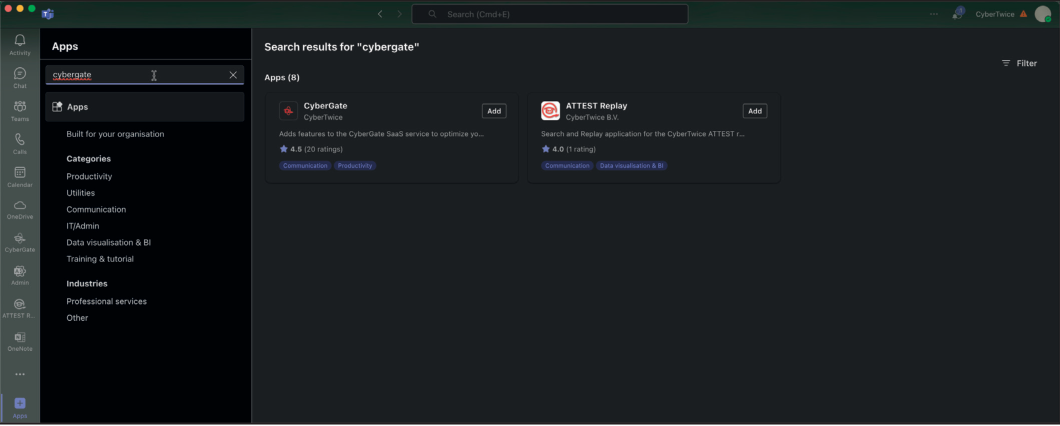
- Click ‘Add’ to add CyberGate to Microsoft Teams
Note: You may be asked to provide consent for basic permissions (View your basic profile, Maintain access to data you have given it access to). Accept these permissions to use the app.
-
After installation, the CyberGate app will open and show the availability menu
-
Pin the app (recommended): Right-click on the CyberGate icon and select ‘Pin’
Feature 1: Availability
Section titled “Feature 1: Availability”How It Works
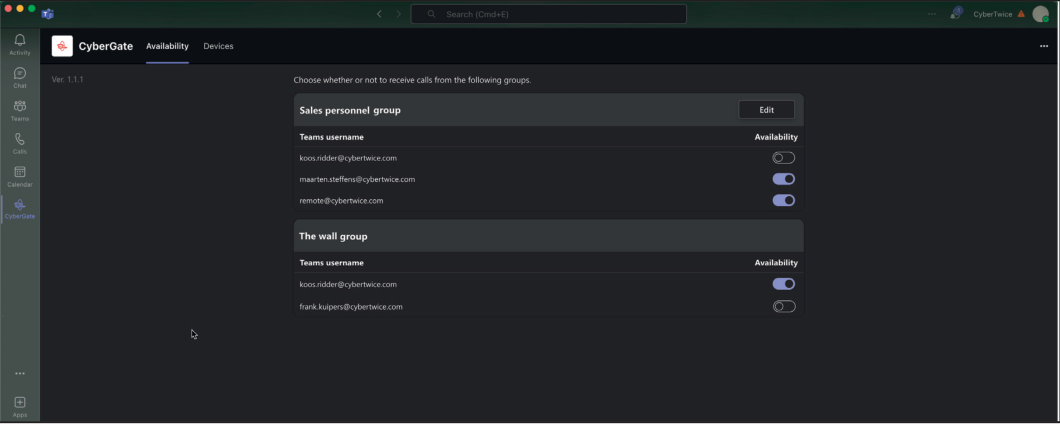
Section titled “How It Works”The CyberGate app uses the same credentials as Microsoft Teams and automatically retrieves information about Multi-ring groups you belong to.
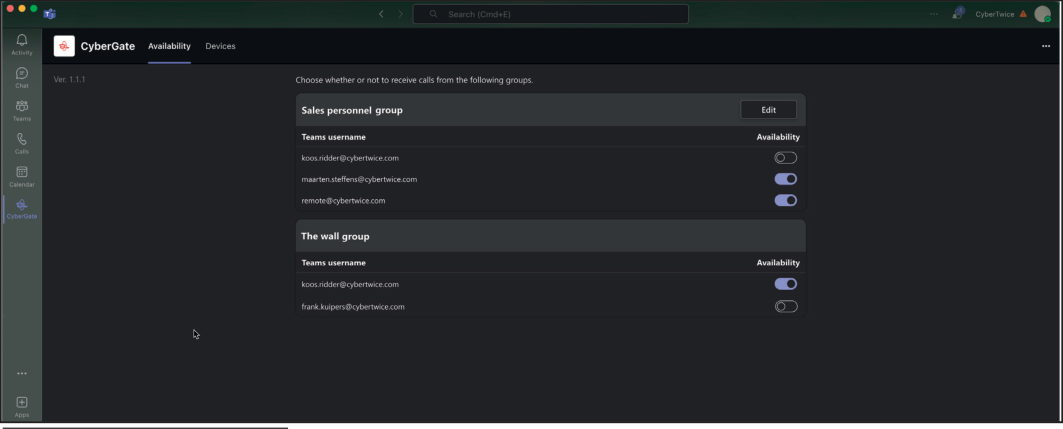
Example Scenario
Section titled “Example Scenario”In this example, the user koos.ridder@cybertwice.com is part of two Multi-ring groups:
| Group | Members | User Role |
|---|---|---|
| Sales personnel group | 3 users | Supervisor (*) |
| The wall group | 2 users | Normal user |
User Roles
Section titled “User Roles”| Role | Permissions |
|---|---|
| Supervisor | Can set availability for ALL users in the group, can add/remove users |
| Normal User | Can only set their OWN availability status |
Availability Status
Section titled “Availability Status”| Status | Effect |
|---|---|
| Available | You can be called by CyberGate |
| Unavailable | You won’t be called by CyberGate |
Note: Availability status changes take effect immediately.
Tip: To configure the supervisor role for a Multi-ring group, use the CyberGate Management Portal.
Feature 2: Devices
Section titled “Feature 2: Devices”How It Works
Section titled “How It Works”The Devices menu shows an overview of all configured devices in your Tenant, sorted by location. You can filter results to find specific devices.
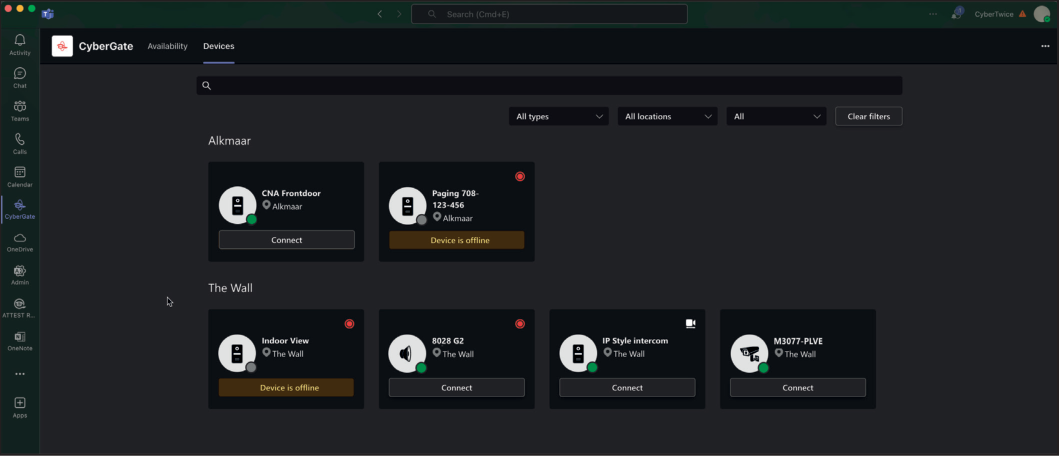
Device Tile Information
Section titled “Device Tile Information”Each device tile displays:
| Information | Description |
|---|---|
| Device Type | Intercom, camera, or audio/paging |
| Device Name | Configured name of the device |
| Online Status | Whether the device is online or offline |
| Recording Status | Whether recording is enabled |
| Two-Way Video | Whether two-way video is configured |
Connect Button
Section titled “Connect Button”If a device is configured to receive calls from Microsoft Teams, a Connect button will appear. Clicking this button initiates a call to the device.
Note: The devices shown to a user can be limited using the Device access settings in the CyberGate Management Portal.
Feature 3: Door-Open Button
Section titled “Feature 3: Door-Open Button”Introduction
Section titled “Introduction”During a call between the intercom and a Teams user, you can easily open the door by clicking a button on the sidebar.
Note: Not all intercoms feature a remote door-open capability. Check the configuration of your intercom(s) for this feature and for the DTMF code used to open the door.
How to Activate
Section titled “How to Activate”Step 1: Configure Open Door Code
Section titled “Step 1: Configure Open Door Code”-
Log in to the CyberGate Management Portal
-
Navigate to Basic → Device
-
Click the blue edit button to open device details
-
Fill in the ‘Open door code’
Important: The ‘Open door code’ must match the configured open door code in the intercom device!
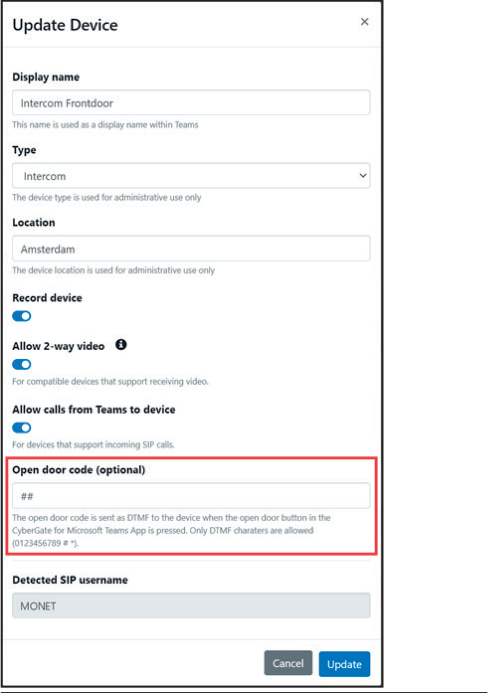
- Click the blue ‘Update’ button
Step 2: Add CyberGate to a Call
Section titled “Step 2: Add CyberGate to a Call”-
Make a call from the intercom to your Teams client and accept the call
-
Click on the ‘Apps’ icon in the top bar

- Add CyberGate — a dialog will open
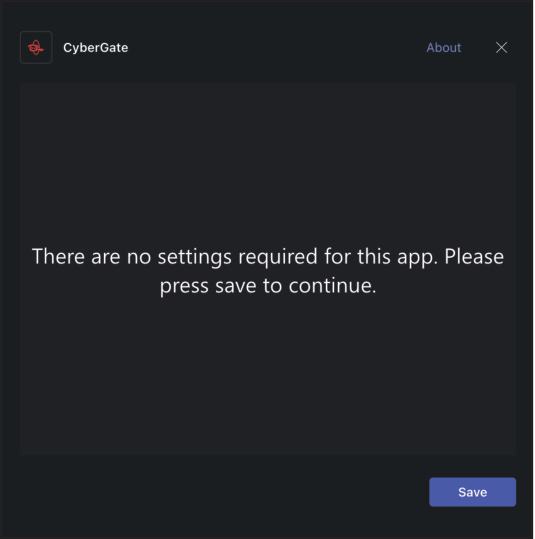
- Press ‘Save’ to continue
Step 3: Use the Door-Open Button
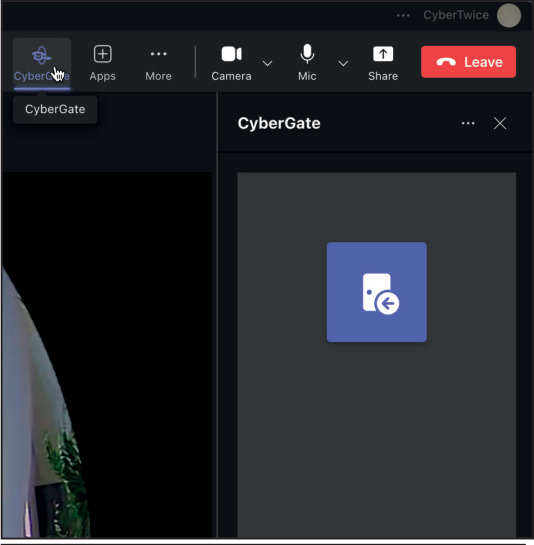
Section titled “Step 3: Use the Door-Open Button”- A sidebar opens on the left of the call window with the Open door button
-
Click the button to open the door
-
End the call when finished
Tip: The Open door button can be added to all future calls by clicking on the CyberGate icon in the top bar during any call.
Document History
Section titled “Document History”| Version | Date | Author | Change |
|---|---|---|---|
| 1.0.0 | 2025-03-07 | KR | Initial version |
| 1.0.1 | 2025-03-24 | KR | Improved screenshots |
| 1.0.2 | 2025-05-02 | KR | Improved layout |